%% run start
```ts
const {LinkPreview} = customJS
return LinkPreview.getLinkPreviewFromUrl("https://www.namecheap.com/support/knowledgebase/article.aspx/9607/2210/how-to-set-up-dns-records-for-your-domain-in-cloudflare-account/")
```
%%
<div class="nifty-link-card-container">
<a class="nifty-link-card" href="https://www.namecheap.com/support/knowledgebase/article.aspx/9607/2210/how-to-set-up-dns-records-for-your-domain-in-cloudflare-account/" target="_blank">
<div class="nifty-link-card-text">
<div class="nifty-link-card-title line-clamp-2">How to set up DNS records for your domain in Cloudflare account - Hosting - Namecheap.com</div>
<div class="nifty-link-card-description">Learn more about How to set up DNS records for your domain in Cloudflare account. Find your answers at Namecheap Knowledge Base.</div>
<div class="nifty-link-href">
<img class="nifty-link-icon" src="https://www.namecheap.com/assets/img/nc-icon/namecheap-icon-152x152.png">
https://www.namecheap.com/support/knowledgebase/article.aspx/9607/2210/how-to-set-up-dns-records-for-your-domain-in-cloudflare-account/
</div>
</div>
<div class="nifty-link-image-container">
<div class="nifty-link-image" style="background-image: url('https://files.namecheap.com/cdn/1092/assets/images/namecheap.png')">
</div>
</div>
</a>
</div>
%% run end %%
### How to set up DNS records for your domain in Cloudflare account
There are two ways to enable **Cloudflare** for your domain name:
1\. By means of a **CNAME record** for _www.domain.com_.
**NOTE**: CNAME setup is available for paid Business or Enterprise Cloudflare plans.
2\. By pointing a domain name to Cloudflare nameservers which is possible after signing up with Cloudflare, but additional steps below should be performed in order to make your domain work properly.
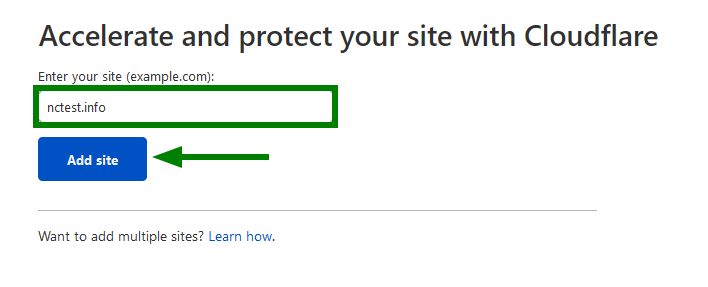
Once you have signed up, you will be redirected to configuring your first domain name. You will need to enter your domain name you would like to enable Cloudflare for and click on **Add site**:
On the next page you will need to choose a prefereable CDN plan. You can choose the Free plan by a default. Click on its icon and the **Confirm plan** button to proceed:
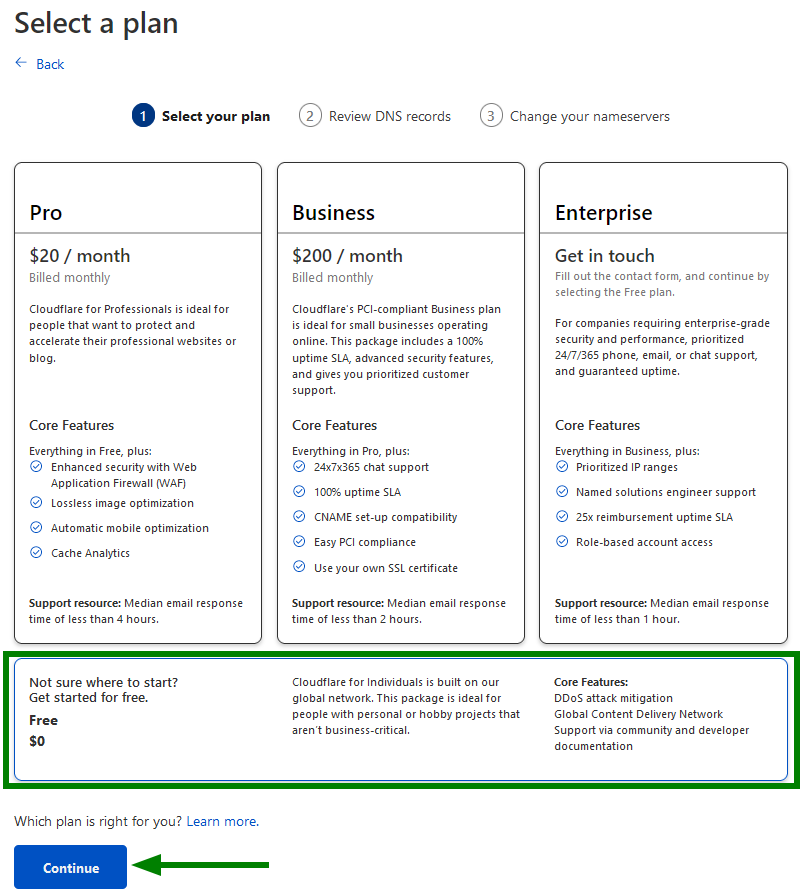
You may purchase one of the paid Cloudflare plans later if you wish to get more features. You can compare these plans at [https://www.cloudflare.com/plans](https://www.cloudflare.com/plans).
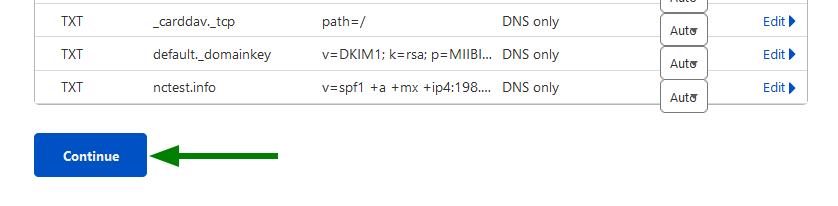
On the next screen, you will see the list of your existing host records. Be sure to double-check if the specified [DNS](https://www.namecheap.com/dns/what-is-dns-domain-name-system-definition/) records match the ones in your cPanel.
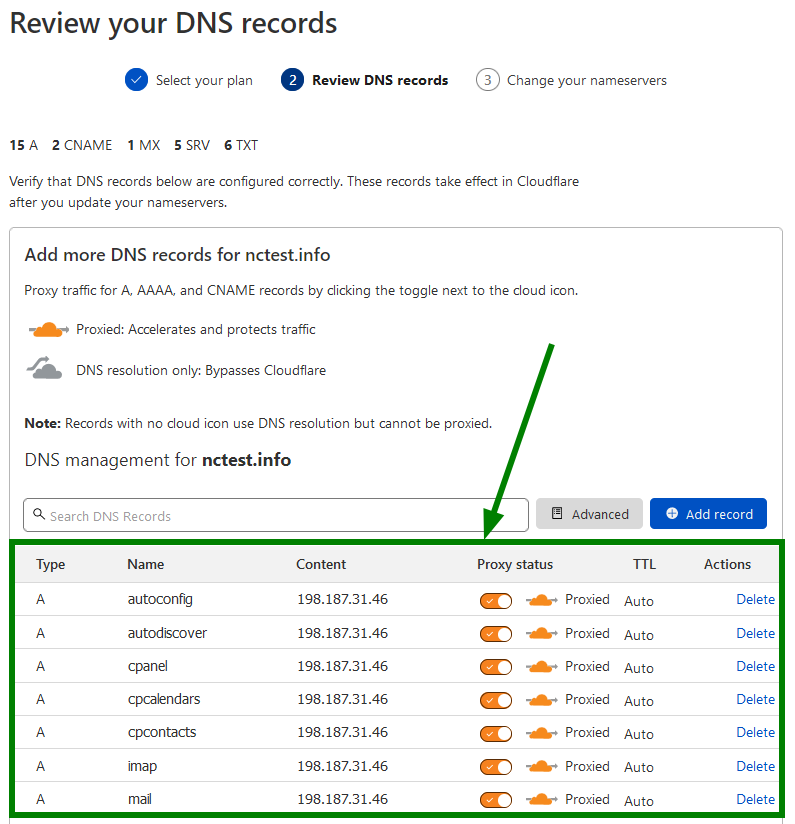
**NOTE:** It is not recommended to modify DNS records at this stage as you will be able to do this after the setup is complete.
If records shown in the list are correct, you can scroll down and click **Continue**:
On the next page, you will be offered to change nameservers to the Cloudflare ones:
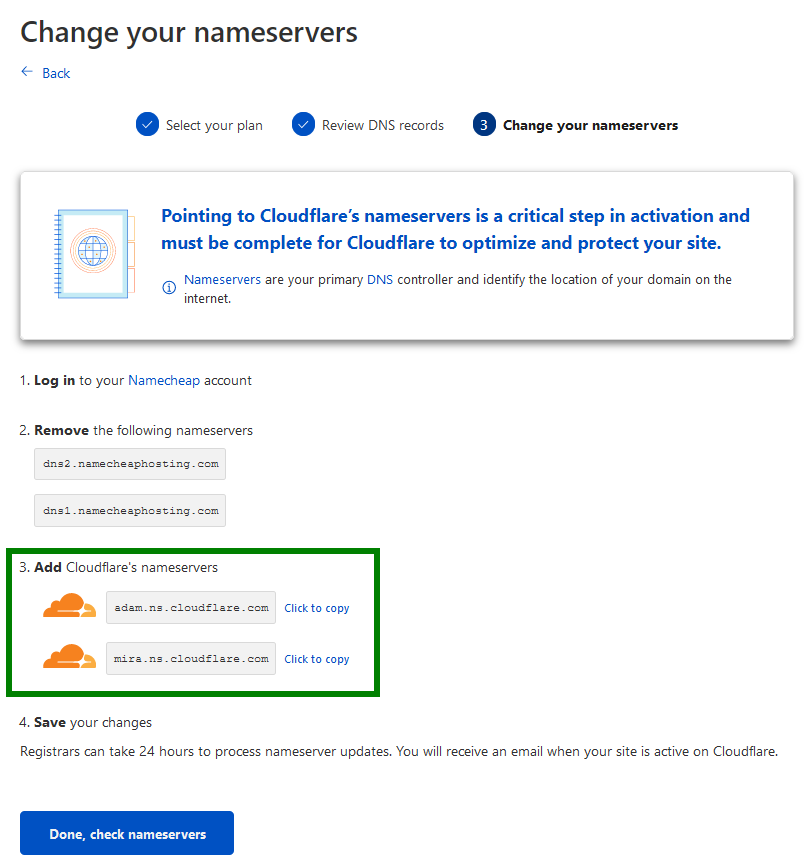
If your domain is registered with another [domain registrar](https://www.namecheap.com/), you need to log into your account there and change the nameservers for the domain.
If your domain is registered with Namecheap, you need to follow the instructions below:
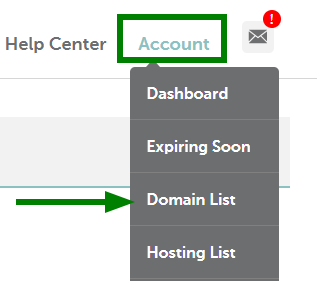
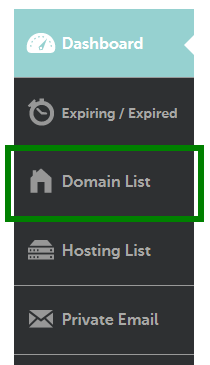
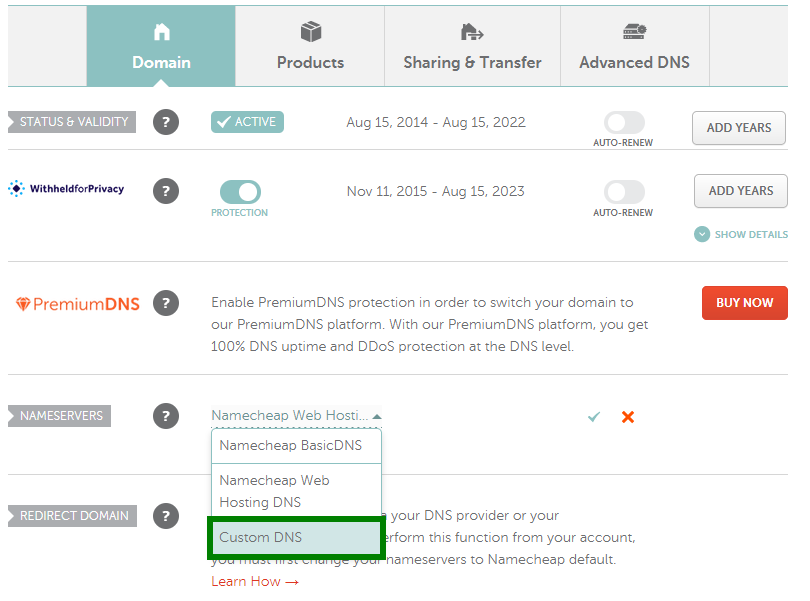
1\. Log into your **Namecheap account** in a separate tab if you are not logged in yet. Once you are in, mouse over the **Account** option in the upper right corner of the page and choose **Domain List** or choose the **Domain List** menu in the left sidebar:
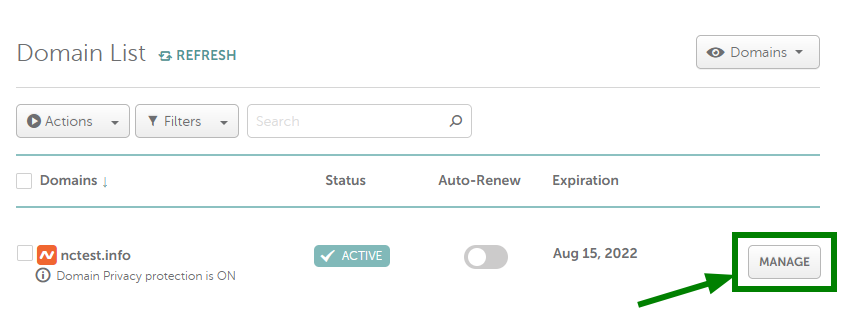
2.Click on the **Manage** option in front of the domain name you wish to point to Cloudflare DNS:
3\. On the **Domain** tab, please click the drop-down menu next to the **Nameservers** option and select **Custom** nameservers type:
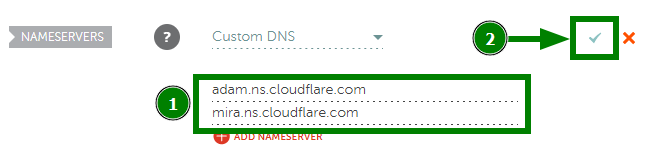
4\. Enter the nameservers specified in the **Cloudflare account**, then click on the check-mark:
**NOTE**: Once the nameservers have been set up, it may take up to 24-48 hours (in rare cases more) for local ISPs to update their DNS caches so that everyone can see your website. Since the caching time varies between ISPs, it takes time for DNS changes to be totally in effect.
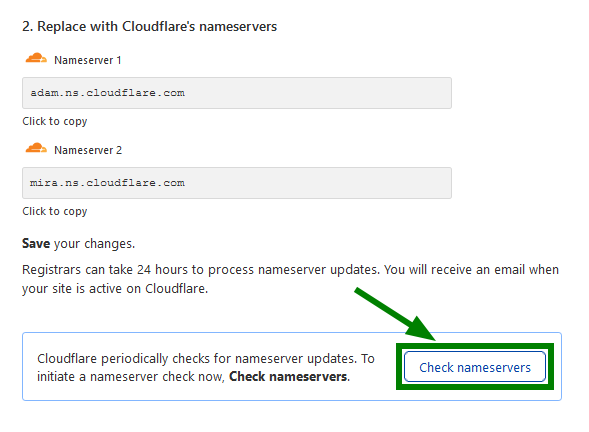
Once the nameservers are set up, return to the Cloudflare tab and click **Check nameservers**:
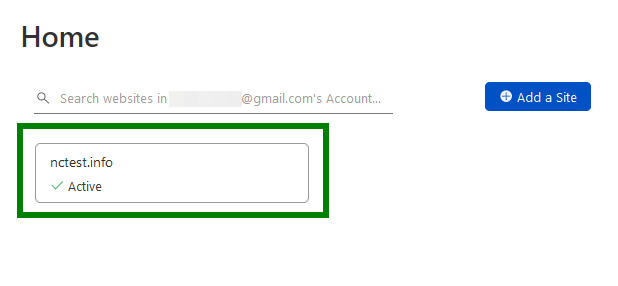
If the nameservers have been successfully updated, you will see the **Active** status:
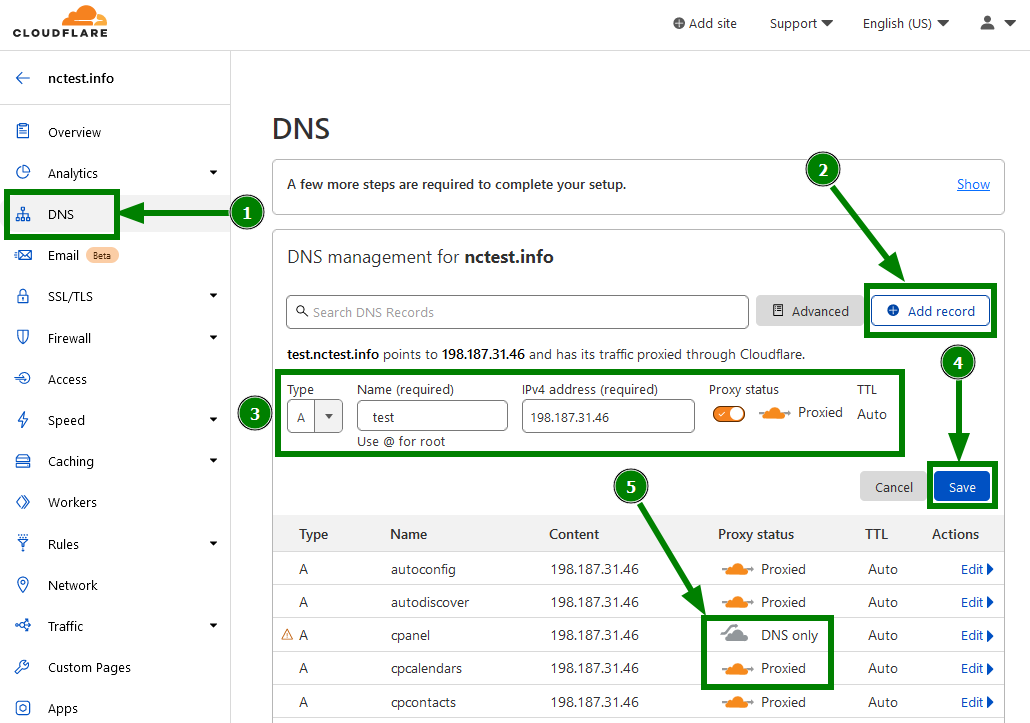
Now you may proceed with setting up DNS records in the **DNS menu**. On the **DNS Records** page (1), you may add or delete the DNS records for your domain. In order to add any record, click **+Add Record** (2) and choose **the record type** you need, the **hostname** (subdomains or domain itself) and **value of the record** (3). TTL will be set up automatically. When the record is ready, click on **Save** (4). Also, you may **deactivate** or **activate** the Cloudflare service for each record by clicking on the orange/grey cloud under the **Proxy status** column (5):
**NOTE:** After the nameservers change all the DNS records for your domain in cPanel will be no longer active. That is why make sure they have been set up in your Cloudflare account. The new DNS records should be created in the Cloudflare account as well. For instance, if you wish to switch to another mail service or update the IP address for your domain, the MX and A records should be updated correspondingly.
That's it!🎉