%% generate tags start %%
#software-engineering
%% generate tags end %%
#software-engineering/remix
> [!info] read more
> 1. ==[Generate open graph social preview images with Remix (jacobparis.com)](https://www.jacobparis.com/content/remix-og)==
> 2. [dynamic OG image in remix using satori](https://www.simeongriggs.dev/serve-dynamic-og-images-from-remix-with-satori)
On most social networks and messaging applications, an "Open Graph image" will accompany a link to a URL. They're proven to drive engagement.
Here's a link to the [image generated for this post](https://www.simeongriggs.dev/resource/og?id=37ef2697-6cab-499e-97a9-c3129290e412).
## Background
Vercel recently [launched @vercel/og](https://vercel.com/blog/introducing-vercel-og-image-generation-fast-dynamic-social-card-images), which makes creating images on demand – on their Edge network – simple. It's powered by [Satori](https://github.com/vercel/satori) which converts a subset of HTML and CSS into an SVG.
Previously I used it for this blog, but I like to keep everything contained in one project – so I was curious to use it with Remix.
In this guide, you'll design an image using Satori in a [resource route](https://remix.run/docs/en/v1/guides/resource-routes), convert it to a PNG and return it as the response from Remix.
This is a much _lighter_ method of dynamically generating images from web pages using Puppeteer or Headless Chrome. It's also much cheaper than my previously preferred way of dynamically creating images using a Screenshot API service.
## Getting Started
### Install Packages
In your Remix application, from the command line, install `satori` and `resvg`.
```
npm i satori @resvg/resvg-js
```
- [satori](https://github.com/vercel/satori) will convert HTML to an SVG
- [resvg](https://github.com/yisibl/resvg-js) will convert this SVG to a PNG
### Add a Font
Satori requires a font in order to render text in the SVG. Currently, it only supports TTF, OTF and WOFF files – but remember, we're not sending these files to the user, just using them on the server to generate the image. So filesize shouldn't be a concern.
In this example, I'm using Inter; .
Add your font file(s) to the `/public` directory inside a `/fonts` directory:
```
./public/fonts/Inter-ExtraBold.otf
```
### Create a Server-side only Function
Because satori and resvg are packages that shouldn't be bundled into the client side – but will be used from a resource route – their use should be [siloed into a server-side only file](https://remix.run/docs/en/1.13.0/pages/gotchas#server-code-in-client-bundles).
Create this new file in your Remix application:
```tsx
// ./app/utils/createOGImage.server.tsx
import {Resvg} from '@resvg/resvg-js'
import type {SatoriOptions} from 'satori'
import satori from 'satori'
import { OG_IMAGE_HEIGHT, OG_IMAGE_WIDTH } from '~/routes/resource/og'
// Load the font from the "public" directory
const fontSans = (baseUrl: string) =>
fetch(new URL(`${baseUrl}/fonts/Inter-ExtraBold.otf`)).then((res) =>
res.arrayBuffer()
)
export async function createOGImage(title: string, requestUrl: string) {
const fontSansData = await fontSans(requestUrl)
const options: SatoriOptions = {
width: OG_IMAGE_WIDTH,
height: OG_IMAGE_HEIGHT,
fonts: [
{
name: 'Inter',
data: fontSansData,
style: 'normal',
},
],
}
// Design the image and generate an SVG with "satori"
const svg = await satori(
<div
style={{
width: options.width,
height: options.height,
background: 'linear-gradient( 135deg, #FD6585 10%, #0D25B9 100%)',
color: 'white',
fontFamily: 'Inter',
fontSize: 100,
display: 'flex',
alignItems: 'center',
justifyContent: 'center'
}}
>
<div>{title}</div>
</div>,
options
)
// Convert the SVG to PNG with "resvg"
const resvg = new Resvg(svg)
const pngData = resvg.render()
return pngData.asPng()
}
```
### Create a Resource Route
In Remix, a [resource route](https://remix.run/docs/en/v1/guides/resource-routes) adds functionality to your application without adding to its user interface. This is why this route only has a `loader` function and not a default export with a React component.
This routes' only task is to receive a request, check the search parameters and respond with a PNG image.
Create a new resource route file in your Remix application:
```tsx
// ./app/routes/resource/og.ts
import type {LoaderArgs} from '@remix-run/node'
import { createOGImage } from '~/utils/createOGImage.server'
export const OG_IMAGE_WIDTH = 1200
export const OG_IMAGE_HEIGHT = 630
export const loader = async ({request}: LoaderArgs) => {
const { origin, searchParams } = new URL(request.url)
const title = searchParams.get('title') ?? `Hello world`
const png = await createOGImage(title, origin)
// Respond with the PNG buffer
return new Response(png, {
status: 200,
headers: {
// Tell the browser the response is an image
'Content-Type': 'image/png',
// Tip: You might want to heavily cache the response in production
// 'cache-control': 'public, immutable, no-transform, max-age=31536000',
},
})
}
```
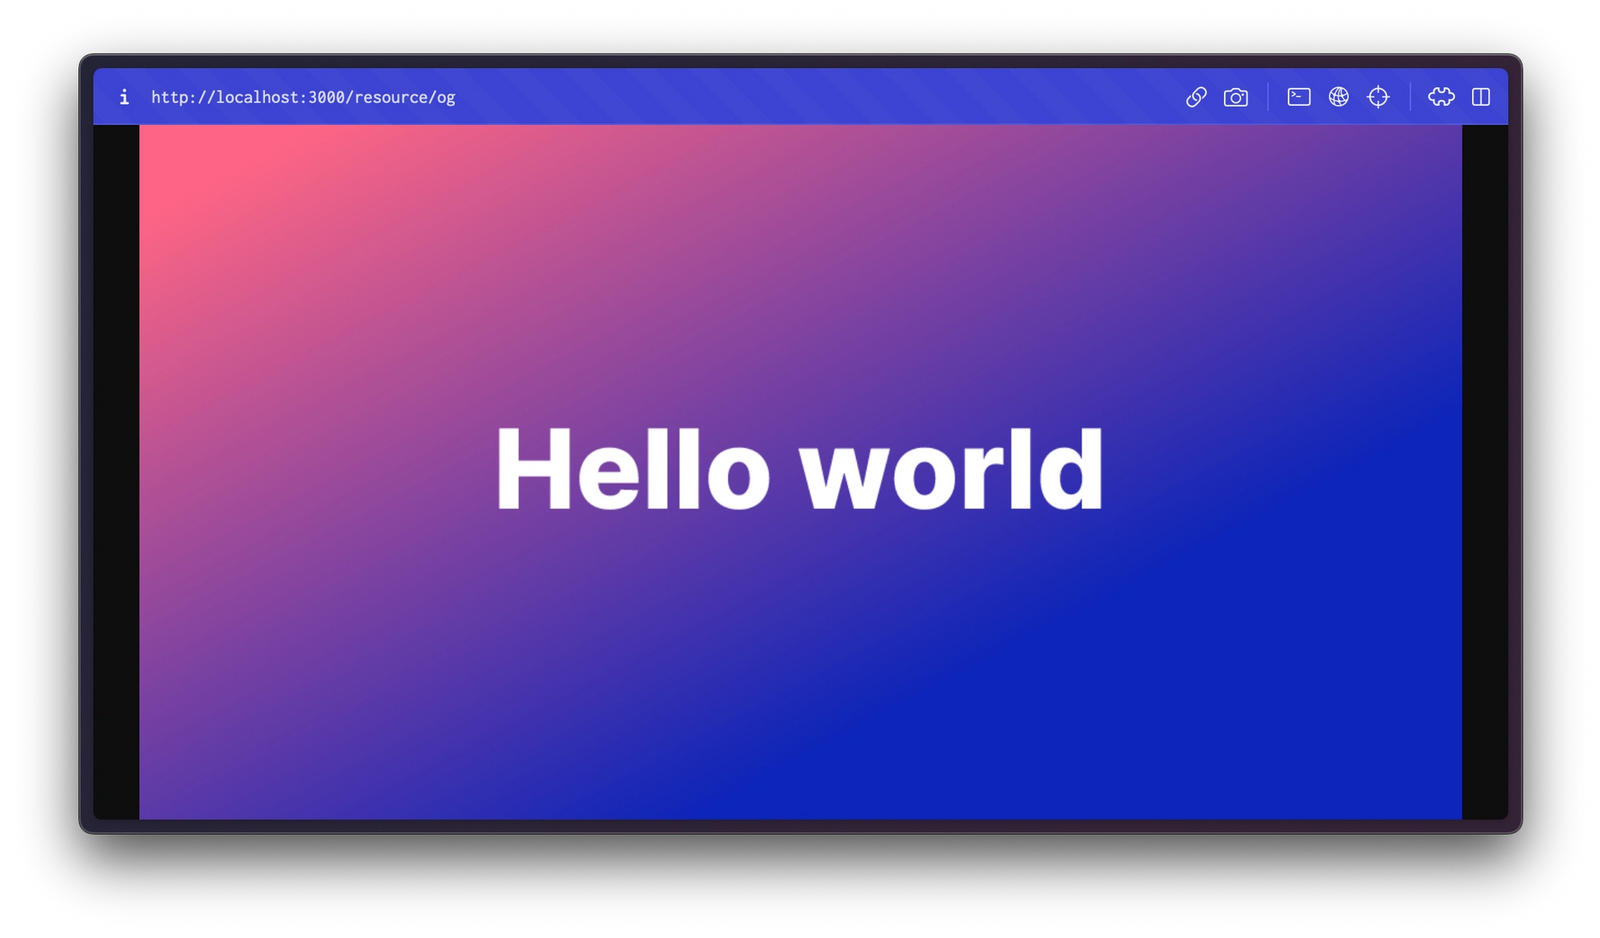
On your Remix app, visit `/resource/og` and see a 1200x630px image with "Hello world" in the centre.
Try modifying the HTML to render a different design. Using inline styles is a bit tricky … but it works!
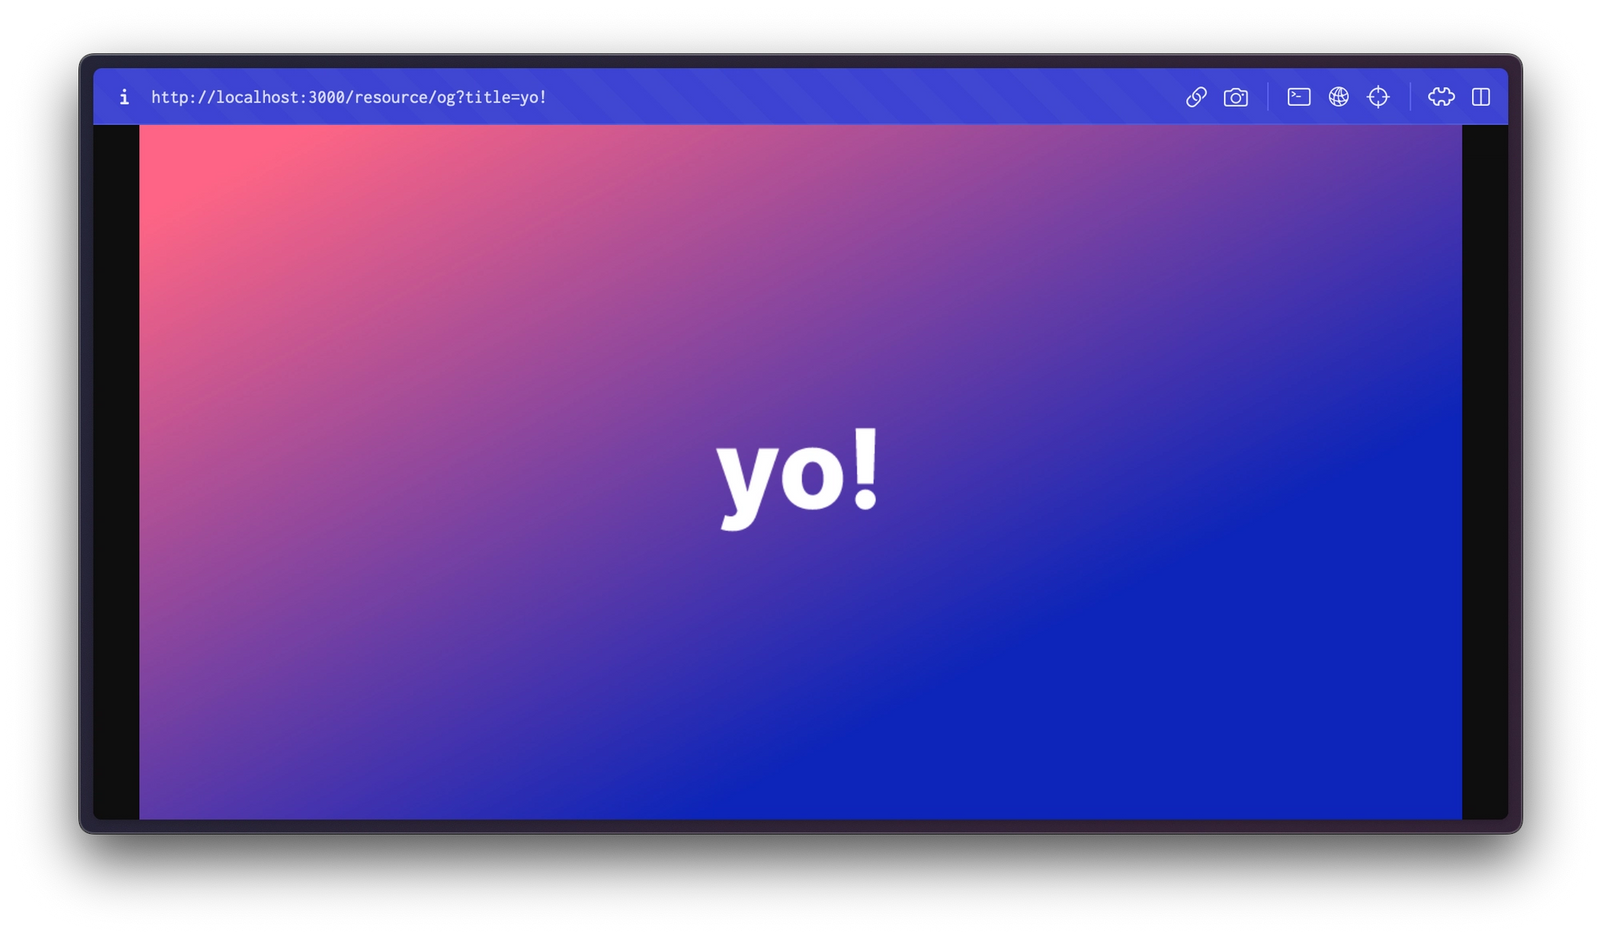
At the top of the `loader`, we check for a search parameter `title`, which we can use to generate different images based on variable data dynamically.
Visit `/resource/og?title=yo!` and see your dynamic images in action.
As your designs increase in complexity, you might pass in more search parameters: title, subtitle, author, publishing data, image assets, colour theme, etc.
However, it's not good practice to blindly take raw, passed-in values and use them in an application. It's liable to misuse.
## Sensible, Dynamic Data
Instead of generating a unique URL with search parameters for every value in your image – use a unique identifier so that you can query that content data at its source to double-check its validity before generating an image.
If you're generating images like these, the data you want to show in them likely comes from the same source the page's content does. For example, you probably have a CMS that stores blog posts, and you'd like to create images for each post.
Tip: If you're interested in pairing Sanity's content management with Remix, [check out this starter template](https://github.com/SimeonGriggs/remix-sanity-studio-v3).
In this example, we're fetching data using Sanity Client:
```tsx
// ./app/routes/resource/og.tsx
import type {LoaderArgs} from '@remix-run/node'
import { createOGImage } from '~/utils/createOGImage.server'
// This import will change depending on your project
import { client } from "~/sanity/client"
export const OG_IMAGE_WIDTH = 1200
export const OG_IMAGE_HEIGHT = 630
export const loader = async ({request}: LoaderArgs) => {
const { origin, searchParams } = new URL(request.url)
const id = searchParams.get('id')
// Reject requests that do not have include "?id=value"
if (!id) {
return new Response('Bad request', {status: 400})
}
// Import the Sanity Client and query for the document with this id
const title = await client.fetch(`*[_id == $id][0].title`, {id})
// Reject requests for documents that don't exist
if (!title) {
return new Response('Bad request', {status: 400})
}
const png = await createOGImage(title, origin)
return new Response(png, {
status: 200,
headers: {
'Content-Type': 'image/png',
},
})
}
```
If you're using Sanity, visit. `/resource/og?id=asdf-1234` (swapping that last part out for the `_id` value of an actual document), to see you now have dynamic – and safe – social sharing images.
## Load the Image with Meta Tags
Now you've created a route for dynamic images; you'll need to add them to the `meta` function of any route that intends to use them.
In the code example below, you're querying for a Sanity document that matches the current `$slug` param. If found, the page will render. In the loader function you're also preparing the full URL to the social share image.
Rendering full URL paths, before any JavaScript initialises, is important for meta tags.
```tsx
// ./app/routes/$slug.tsx (or similar)
import type { LoaderArgs, MetaFunction } from "@remix-run/node";
import { json } from "@remix-run/node"
import { OG_IMAGE_HEIGHT, OG_IMAGE_WIDTH } from '~/routes/resource/og'
// This import will change depending on your project
import { client } from "~/sanity/client"
// Fetch your dynamic data for the page + meta tags
export const loader = async ({request, params}: LoaderArgs) => {
// Import Sanity Client and fetch the document that matches this slug
const page = await client.fetch(`*[slug.current == $slug][0]`, {params})
if (!page) {
return new Response('Not found', {status: 404})
}
// Open Graph images require the full URL, not just a relative path
// You have access to the request.url in loader
// so it's simpler to generate that URL here
const { origin } = new URL(request.url)
const ogImageUrl = `${origin}/resource/og?id=${page._id}`
return json({ page, ogImageUrl })
}
// Generate meta tags
export const meta: MetaFunction = ({data}) => {
// Retrieve these values from the loader
const {page, ogImageUrl} = data
const {title} = page
return {
title,
'twitter:card': 'summary_large_image',
'twitter:title': title,
'og:title': title,
'og:image:width': String(OG_IMAGE_WIDTH),
'og:image:height': String(OG_IMAGE_HEIGHT),
'og:image': ogImageUrl,
// ...and all your other other meta tags
}
}
```
You should now have dynamically generated, content-editable, page-specific and safe social share images!
Some extracurricular next steps might include:
- A [custom view pane component in the Sanity Studio](https://twitter.com/simeonGriggs/status/1630546170480308224) to show these images alongside the document being edited
- Loading image assets from Sanity with crop and hotspot data gives authors even more fine-grained control over the resulting design.